Friday, March 22, 2013

Pre-Schooler Activity: Water & Baby Food Jars


Being a mom of a pre-schooler, I've realized that they love to explore and experiment!  I am always looking for simple "experiments" for her to do and keep her busy!  While we were working on some gardening projects, she discovered that water in baby food jars created different sounds!  She was so excited, we ended up digging out a few more jars for her to play with.

This is an extremely simple, no-mess way to keep your child busy and explore his or her environment.  

Gather the following items:
  • Glass jars or glasses (I happen to have a lot of empty baby food jars, so I opted for those)
  • Water (preferably in something that your child can pour in and out of!)
  • Spoon or metal tool to create sound against glass
  • Other things to clink against the glass such as plastic spoons, wooden spoons, etc. for your child to decide themselves which one works the best  (Optional)

The first thing I did was fill each jar, starting with just a little bit of water, and then adding more and more in each jar.  Once that was finished, I had her use her "tool" to tap each jar and see what kind of sound each one created.  She was so excited to hear the different pitches of sound she got.

Once she realized that the water level was what caused the different sounds, she spent a good hour playing with the jars and water, changing the levels by adding and removing water to test the sounds. 

What I loved about this particular activity is that once I showed her how it worked, she was content keeping herself busy.  It didn't make a mess (other than spilled water), and she was able to do it by herself entirely!

Some good questions to ask your child:
  • What kind of sound does it make if there is just a little bit of water?
  • What kind of sound does it make if there is a lot of water?
  • What do you think will happen if we add more to the jar with the least amount of water? 
  • What do you think will happen if we pour out most of the water in the full jar?

This also opens up a good conversation about "pitch", because you will probably have to explain it to your child.  They will likely know in their head that one jar sounds higher and the other low, (and everything in between), but won't have the words to verbalize it.  

Most of all, have fun watching your child explore and learn!

xoxo
Dani

Wednesday, March 13, 2013

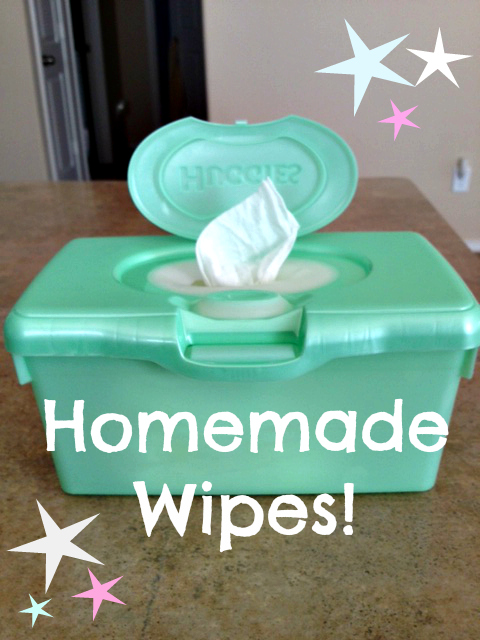
Homemade Wipes: In a Wipes Container


If you have been blessed with children that have incredibly sensitive skin, you may know a thing or two about making your own baby wipes.  It isn't difficult and you can create your own recipe using paper towels, baby wash, oil, and water.  Before I ever did this, I read through about ten different blogs and (no joke) none of them made their wipes the same way, so feel free to get as creative as you please.

I however, am a simpleton in this area.  I don't get fancy.  In fact, I prefer to just skip all of the hassle and buy wipes, but because of skin sensitivities, homemade wipes it is! 

**Because my least favorite part of this project is cutting the paper towel rolls in half, I always do this ahead of time and store them in the closet** 

To Make Homemade Wipes You will Need:
  • Viva Brand Paper towels in select a size (cut in half--so it looks like an over sized roll of toilet paper)
  • Leftover wipes container 
  • 2 1/2 cups of water (boiled and then cooled to room temperature)
  • 2 tbsp baby wash
  • 2 tbsp oil

Once you have boiled & cooled your water, mix in the baby wash and oil and swish it all around.  Honestly, I'm so lazy now when I do this, that I just eyeball it.  When I actually take the time to use the correct amounts, though, they turn out so much better!

Put your 1/2 paper towel roll inside the wipes container so that it's sticking out.  Like this...


Don't even bother wondering HOW this thing is going to end up fitting in here.  I was terrible in physics & science so I can't answer that for you.  I just know it works. 

Next, pour your water mix all over the paper towel roll trying to get it as saturated as possible and then pour the rest of the water into the container.  Once you have done so, press down on the roll so that it flattens down into the container.  Don't worry about what it looks like, we are going for practicality here.


Close the lid and flip the container upside down.  If the lid doesn't close entirely, don't stress about it.  I usually just lay mine on top of a towel and it hardly ever leaks.  Leave this upside down for at least 5 minutes.


After 5 minutes, flip it back over and open the lid.  Pull out the cardboard roll from the middle of the paper towels.  Trust me when I say DO NOT attempt to do this before this step.  I know some of you will try, and you will understand why I told you not to!  (I was that person, I tried it just because I had to know WHYYYYY I wasn't supposed to do it! lol)


When you pull the cardboard out, it should pull up the first "wipe".  If it doesn't, don't stress, just pull it out yourself.  Close the lid and pull it on through!  Viola!   You now have homemade wipes in an actual wipes container so you don't have to deal with annoying lids! 


What do you make instead of buying store-bought items?  I'd love links to your "recipes"!

xoxo
Dani

Thursday, March 7, 2013

There's Still Wax...But The Candle Won't Light!

It drives me crazy when my candles won't light, but there is still a ton of wax left in them!  Anyways, as dumb as it sounds, it hit me the other day that I have the perfect solution built right into my kitchen! 

Not everyone will have one of these, (sorry), but those of you that do are in LUCK! 

What am I all excited about?  A WARMER plate built right into the top of my range! 


That's all!  That's my big secret.  I just turn the warmer on (which is right between my two back burners) and sit the candle on there.  It gets hot enough to melt to wax and make my house smell better, but never so hot that the candle is too hot to handle. 

Impressive, I know.  But hey, I just saved myself ten bucks by not running out to by another candle for my kitchen!  :) 

xoxo
Dani

Tuesday, March 5, 2013

Cloth Diapering Basics

...By a very NON-expert!  


After getting quite a few questions from friends and family about cloth diapering, I decided to *attempt* to answer a few of the more common questions in a video!  If you haven't watched it yet, be sure to click play above!  

In this video, I will cover the following questions:
  • How do cloth diapers work?
  • What do you do with a wet diaper?
  • What do you do with a poopy diaper (because what mom doesn't love to talk about poop, right?!)
  • Why use cloth diapers?  

I'm still a newb to cloth diapering, but what I've figured out is that the best way to learn is to dive in head first!  No one cloth diapering momma does it the same, and we all have different tastes and preferences. While one mom may swear by all-in-one diapers, another may only like pockets, and some even like good old-fashioned prefolds!  There is no right or wrong, only what is right for you!

I'm excited about doing some more cloth diapering videos, and would love to know what other questions you have!  Once I have some more questions compiled, I will get another video together!  So be sure to leave questions in the comments below!

xoxo 
Dani

PS- This was my FIRST video ever so be sure to spare me some grace!  :) 

Tuesday, February 12, 2013

Happy Engagement - Anniversary!

Two years ago, my Hubby, (then boyfriend), melted my heart on a sunny beach in California with those four little words every girl dreams about, "Will you marry me?" scribbled on the crisp leather of a brand new baseball. 

I still get excited when I think about our engagement, because it was so perfect and so perfectly tailored to us and our story.  We had talked about marriage plenty, and even talked about our future wedding a lot, in fact, the ring was already picked out (with my help of course), but I wanted an official proposal.  I wanted the kind of proposal that we would have fun retelling to our kids someday.  One with romance and young love -- (you know, the kind of story that will make them want to gag and leave the room! HA!)

The bar was set pretty high, but boy, did my man deliver!


What the video doesn't show was his cousin hiding to capture the entire proposal on camera for us.  Or the bag he had already packed for me with a change of clothes and my makeup to get ready for dinner, which he had already made prior reservations for. Or the personalized bottle of champagne and balloons from one of our good friends on our table when we arrived. Or the engagement gifts that awaited us at home already. It definitely doesn't show the six years prior to being engaged that we had devoted to each other: the good, the bad, the trials, and the celebrations (and trust me, there were plenty of all of those things!).

It was a day that I had dreamed about since I met Brian and knew he was "The One".  It was the kick-off to the best Valentines Day ever.  It was a moment that will never be overlooked, under-appreciated, or forgotten.

Happy "Engagement Anniversary" Baby!  Thank you so much for taking the time to plan the most perfect, special, & memorable proposal two years ago! 

xoxo
Dani


How did your husband propose?  Or if you ARE the husband, how did you propose?  Please share in the comments below!  I love to hear stories :)

Wednesday, February 6, 2013

DIY Desk Re-do: From Trash to Treasure!


As I've mentioned before, one of my favorite hobbies is refinishing old furniture!  I love seeing each piece come to life after a transformation!  This project was one that almost didn't happen, but after seeing how beautiful it turned out, I'm so glad it did!

I'll spare you the details on where we got this desk, because it's kind of a long story,  but we didn't pay a dime for it!

This is what it looked like when we brought it home...


Ugh!  I can't lie, it was pretty nasty looking.

**If you aren't sure about the difference between supplies, sanders, etc... see my post HERE**

First Things First!  SANDING!  

The first thing we did was sand it down using our hand sander.  Brian took over this part of the project since I was consumed with "Motherly Duties", so I can't comment on what grit he used, but I'm pretty sure it was 60 or 80.  The idea is just to "rough up" the surface layer.  You want to make sure you aren't scratching it all up or trying to sand off more than necessary!  

Tack Cloth is My New Best Friend!

Next, we wiped it down good with tack cloth.  If you are going to be sanding anything down, I HIGHLY recommend having tack cloth on hand!  It's super cheap and gets the job done.

Primer Isn't Always Necessary If you Sand Properly!  

We skipped primer and went straight to paint.  If we weren't painting this desk black, I probably would have used a primer just to help coat the darkness of the finish, but I personally think primer is a waste of time when going from dark to darker!  If you have sanded well enough, there is no reason the paint shouldn't adhere. 

Quality Paint Makes a Difference! 

I can tell you from experience, that quality paint makes all the difference when refinishing furniture.  I have done projects with just cheap interior wall paint, and I've done projects with pre-mixed higher quality paints.  For this project we used a pre-mixed black Valspar paint. Since I'm not home, I'll have to update with the actual paint we used later!

Don't Skip the Sealer! 

It's important to seal your project!  We use a spray-on, Valspar clear semi-gloss.  It goes on so nicely and finishes off the project.  It makes wiping it down easier too!  You definitely don't want to finish this step.

Finish With Affordable Hardware!

Hobby Lobby is usually my go-to spot for new hardware.  It's incredebly cheap, usually $3 a piece, and they have a huge selection.  However, they didn't have the sleek, silver finish I was looking for, so we headed to Target.  Luckily they had what we wanted for about the same cost!

FINALLY My Vision Came to Life!  


It turned out perfect!  Even Brian, who really, REALLY didn't want to bring this desk home admitted that he was glad I talked him into it! 


More projects to come!

xoxo
Dani

Friday, February 1, 2013

Finish The Sentence Friday: My Stint With Reality TV!

Today is a big day for me!  I am joining in on my first "Blog Hop!"

If I'm being completely honest, I have no clue exactly how it works, but I'm happy to jump in because (a) I don't have to choose a topic to write about, it's already decided for me... and (b) I get to meet lots of other cool bloggers.  Win-win!

This particular blog hop is called Finish The Sentence Friday, and the topic this week is:

When it comes to reality TV shows, I... 

...Remember the time I got to be a part of one!


Yup!  You read correctly!  Never in a million years would I have thought I would be a part of reality TV, but a couple years ago the opportunity came up and I jumped on it!  

If you read my last post, you saw that I worked with my friend, Tara, over at Fairytale Hair & Makeup.  Fairytale specializes in hair & makeup for weddings, specifically on-location (that means, there is no studio or salon, we drove wherever we were needed). Tara built up quite a name for Fairytale, and one day she got an offer that none of us could refuse:  An opportunity to do the hair for a bridal party that was being featured on David Tutera's "My Fair Wedding".  


In case you don't know who David Tutera is or don't have a clue about the show My Fair Wedding, for us at Fairytale, this was like getting to go to the SUPERBOWL of the bridal hair & makeup world. (It's. a. BIG. Deal!)


Besides the excitement of getting to work along side the fabulous & gorgeous David Tutera, we were all sick with nerves at our work being on TV!  Talk about pressure! 


It ended up being an amazing experience, loads of fun, and David and his crew were completely awesome to work with.  Fairytale gained a ton of exposure and future jobs with the show (which of course I no longer got to be a part of since I moved out of state- BOO!).  

Overall, it was something that I was so glad I got to be a part of!  I was lucky to have my little (correct that), very tiny place in the reality TV world!  

And just for kicks, when I was digging through old location pics, I found this little goodie from when we had a gig for a Progressive Insurance promotion and we got to meet FLO!  And no, that is not a look-a-like, it was really her!  So much fun!  


Do you have any good "Reality TV" stories?  Share them in the comments below!  

**Link up to Finish The Sentence Friday Here**


Finish the Sentence Friday

Wednesday, January 30, 2013

Life is a Fairytale!

Today is a very special day!  It is one of my beautiful friend's birthday!

I met Tara a few years ago after becoming her assistant in her hair and makeup business, Fairytale Hair & Makeup.  I learned pretty quickly that Tara is ten kinds of crazy, incredibly brave, successful, passionate, and secretly wishes she could be reincarnated as   believes she is a Disney Princess! 

Back when we met, we spent a lot of time in the car together, driving to Los Angeles to do hair and makeup for weddings at hours where there were only two kinds of people out:  criminals and us.  (and GIRL do we have some funny stories from those days!)

Since then, Tara has become a huge part of my life!  She has taught me so much about adventure, love, & following dreams.  It's definitely safe to say I love this crazy chic!  

So without any further blabbering, Happy Birthday to my fabulous friend!  Life is so much better with you in it!  Thank you for showing me that with some faith, (and a little bit of pixie dust), every story can be a fairytale!  MUAH! 


xoxo
Dani

PS-
Be sure to head over to her facebook page and show her some Birthday L-O-V-E! 
Fairytale Hair & Makeup on Facebook

PSS-
See that yin-yang chocolatey goodness in the picture?  If you have not been to The Melting Pot and ordered it, drop everything you are doing and go get some!  The. Best. Ever!  Seriously

Tuesday, January 29, 2013

Well That Was Lame...

Fortune Cookie Inspiration


This last week, I sat down to write about ten different times and even wrote multiple pages of material that I will probably never use because I wasn't happy with it.  And when I can't write, I can't sleep! 

I finally decided I'd had enough.  My one person pity-party had to come to an end!  It was time to suck it up, put on my big girl panties, and actually finish a blog post.  This sounds like a simple enough task, but my writer's block had gotten the best of me, leaving me frustrated and irritated at my lack of production every time I sat down at my computer. 

So last night, after getting both girls to sleep, (this is an accomplishment in itself), I still couldn't pin down a subject.  Rats.  This definitely called for some popcorn.  (Normally this would call for a glass of wine, but since I'm out right now, popcorn had to suffice.)  I opened the pantry door to get some kettle corn only to notice a fortune cookie staring me right in the face from the shelf.  "Hmm, what if I opened the fortune cookie and wrote about whatever the fortune inside said?"

After pondering whether the idea was stupid or not (hindsight is 20/20 by the way...) I decided that this was the perfect exercise to break out of my funk!  And so it was decided...the subject of my next post was in the hands of whomever (or whatever) stuffed this little buddy over at "Baily Fortune Cookie" factory!  I unwrapped the cookie, and before I could even get it out of the wrapper, unintentionally cracked it in half.  Excited to see what it said, I hurriedly pulled the paper fortune out, inadvertently crunching stupid fortune cookie all over my counter at the same time (apparently this was a very brittle fortune cookie!).  I carefully turned over the paper only to read...

 (and yes, this is really the fortune cookie I opened!)

I sat and stared at it, dumbfounded, wondering what the heck kind of "fortune" this was, and laughed at the lack of though provoking subject matter it contained.  Usually they at least give notion to some deep thought about friends, family, or prosperity.  But, nope.  Not this one.  Not tonight, when I was looking for the perfect little piece of inspiration! 

The funny part was, though, this is exactly the kind of thing I needed.  Nothing perfect, silly even, to shatter through the brick wall I have been scratching at for this past week with nothing to even show for.  I then thanked the Lord for his sense of humor, finally wrote something worth sharing, and headed off to bed.  

So remember, friends, when life hands you a fortune cookie, never take it too seriously, and definitely, definitely don't blog about it! 

xoxo
Dani
 

Tuesday, January 22, 2013

DIY His & Her's Coffee Mugs


As much as I would love to take credit for this idea, I saw it all over Pinterest and have been wanting to give it a whirl.  It just so happened that our first wedding anniversary was coming up, and I needed a perfect and personal small gift for the Hubs.  

Anyways-- these make awesome gifts and are a very inexpensive way to add some charm to your coffee mug collection.  (Ehh hem... your company called, and they want all of their cheesy, logo mugs they give away at the Christmas party back!

So without further addooooo... (I know that's spelled wrong, but I'm too tired and lazy right now to look up the correct spelling.  Sorry to all you grammar nazi's reading this.)

DIY His & Her's Coffee Mugs

You will need:

-An oven
-Sharpie(s)
-Coffee mug(s)
-Cookie Sheet

Directions:

1.  Remove any price stickers and clean your coffee mugs.  You can wipe them down with rubbing alcohol if you want, but honestly, I've done it both ways and soap and water seems to be just fine. 


2.  Write your design on your mug.  The options are endless!  I chose to use a line from our first dance because I wanted it to be meaningful!  I also added some personalization on the bottom of the mug.  You will want to go over it with the sharpie more than once to give it a good, bold color.

3.  Set them on a cookie sheet and bake for 30 minutes.  It's best to put them in and THEN turn on your oven.  BUT-- when I made these I forgot to do it that way and they turned out just fine. 


4.  Remove, cool, & enjoy! 


Viola!  You now have some super cute new mugs that didn't set you back $15 each OR have your a company logo on them! 


xoxo
Dani

Have you tried this?  Share any other tips in the comments below!  :)

Wednesday, January 16, 2013

God Sent Me a Letter!

Tonight, I'm feeling extremely unmotivated to write.  I really just want to curl up in bed with a glass of wine, my heating pad on my achy back, and watch trash television.  There are just a couple problems-- I'm still fasting (ie- no wine) and my freaking heating pad is busted.  To top it off it looks like a nuclear laundry bomb exploded all over my living room and I've been trying to comfort a colicky baby for the last three nights to no avail.  Needless to say I am one tired, irritable, not-feeling-so-mentally-stable kinda momma. Aaaaaand it's only Wednesday.

Cool... (In case you can't tell, this is me being sarcastic.)

But just when I'm about to hop on the enemy's pity-party bus... My totally-awesome-mind-reading-ever-present-satan's butt kicking God steps in and directs me to the book of James, revealing to me my own little personalized letter!

"Why James?" I'm thinking...  So I hurry and open up my YouVersion Bible app to the book of James to read this:

"Dear brothers and sisters, when troubles come your way, consider it an opportunity for great joy.  For you know that when your faith is tested, your endurance has a chance to grow." (James 1:2-3 NLT)

A little further reading lands me here...

"God blesses those who patiently endure testing and temptation.  Afterward they will receive the crown of life that God has promised to those who love him.  And remember, when you are being tempted, do not say, "God is temping me."  God is never tempted to do wrong, and he never tempts anyone else.  Temptation comes from our own desires which entice us and drag us away." (James 1:12-14 NLT)

And then it gets really good...

"So get rid of all the filth and evil in your lives, and humbly accept the word God has planted in your hearts, for it has the power to save your souls."  (James 1: 21 NLT)

Wow.  Just...wow.  I love moments like this, when I'm feeling "off" and God just steps in an reveals himself to me, time and time again. It never fails. HE never fails.  I could sit and mope all night, or I can be thankful, better yet, JOYFUL for a challenge that is going to allow me to grow and take my faith to the next level.

All-in-all, I hope this reaches or inspires someone, even if it's just one person who needs to hear it, who needs encouragement, because clearly, I needed to hear it too!  We are never done growing in our faith, and we are never too old to make some changes!  So as the saying goes, "Carpe Diem!"

xoxo
Dani

PS- If you don't have it yet, go to your app store and download the You Version Bible App.  It's free, handy, and is loaded full of devotionals, reading plans, etc!


Monday, January 14, 2013

Free Pink Dresser Re-Do; Fit For a Princess!


Before we got married, we moved around the country wherever Brian was playing baseball, never knowing where the next summer was going to take us.  Because of that, we never really kept furniture around for long, and it also meant that people were constantly giving us furniture they didn't want anymore (umm...thanks?)! 

At any rate, we ended up with this very old, (VERY heavy), dingy, white dresser.  It ended up in The Bug's room and served a good purpose!  As usual, Brian wanted to burn it and crafty little me had a fabulous vision for it!

**Because this was pre-blogging days, I only have before and after pictures for this pink dresser project.  However, this dresser was simple because of it's straight lines, flat surfaces, and the type of paint that was on it previously.  We simply did a light sand on the entire surface of the dresser with 120 grit sandpaper and then painted it with a semi-gloss from Walmart. I spray painted the original handles with white Rust-oleum spray paint in a gloss finish ** 

This was my inspiration picture I found over at Melony's Whimsy Daisy!  You can see her original post here. I still drool every time I see this dresser!  I love its charm!


BEFORE

And then we have our plain-Jane, dirty, white dresser pre-makeover (don't mind all the crap on top of it).


 AFTER

Pink dresser fit for a princess!


I think I spend around $30 on all of my supplies, but to be honest, I can't exactly remember because it was a couple years ago!  Either way, it was considerably less than a new dresser would have cost.

This was the project that really woke up my inner DIY goddess, thus creating a fuel for way more future projects than my poor hubby ever signed up for!  But I'll share those later!  Until next time...

xoxo
Dani

Saturday, January 12, 2013

Un-"wine"-ed

It's really ironic that as I am starting this blog, I'm actually on a fast.  So I haven't even had any wine in 12 days.  Now, this probably makes me sound like a big lush, but I promise you that's not the case!  The thing is, for me, writing usually looks like this...

- Put the girls to bed
- Clean kitchen & pickup living room (or if I'm being honest, load dishwasher, swipe crumbs from the counter into the sink, and throw any toys in living room into the catch-all basket.)
- Pour small glass of wine, and drink half while I peruse around facebook, news articles, and decide what to write about.
- Start writing, realize my glass is now empty, refill, and go back to writing.

There is just something therapeutic about drinking my wine, unwinding, and writing.  I suppose it's sort of like baseball players and chew, or a bride insisting on wearing something blue.  It's not really necessary, but to me, they tend to go hand in hand, and I like it that way. 

So this week, and for another 8 days, instead of being The "Winey" Mom, I guess I'm the Un-"wine"-ed Mom.  It's been good, tempting, and refreshing.  But above all, I've been able to focus on what really matters.  And that is that no bottle of Merlot or crisp, chilled Chardonnay in all of their grape-ey goodness can measure up to the amazing peace that God can bring when I seek him.  God is good all the time, and all the time God is good.  With that...I leave you with an excerpt from Psalm 46:10. 


xoxo
Dani

Friday, January 11, 2013

Yes, I use CLOTH DIAPERS!

"They still make those things?"

I get asked that a lot by people when I tell them that we use cloth diapers. The answer is yes, yes they do!  (And no, I don't make my own soap, churn my own butter, or use cloth toilet paper! --insert eye roll here).  

I'm still learning a lot about cloth diapering, but what I do know is that I love them, and don't know why I waited so long to try it. Well, actually, I know exactly why... I had no idea where to start, how to do it, or what to buy.  Shoot, some days I still feel like that! 

To someone that has no clue about cloth diapering, just figuring out where to begin can be extremely overwhelming.  I dare you to google it, and see the mass amounts of information that comes up.  You will see terms like pre-folds, pockets, AIO's (all-in-one's), AI2's (all-in-two's), hybrids, fitteds, blah blah blah blah blah!  As we say around our house, "It's crazy talk!"

For me, it boils down to three simple things:

1.  Cost Effectiveness
Because we want to have more than two kids, it makes sense to me to purchase diapers once.  Sure, I may pay more up front, but isn't that why people love Costco?

2.  Skin Sensitivities
My babies tend to have hyper sensitive skin (which they can thank me for).  I just feel better having cloth against their skin rather than the chemicals in 'sposies!  In simpler terms, I don't wear paper underwear, so why should my babies? 

3.  The Cuteness Factor
Let's be honest.  Disposable diapers are just not cute. End of story.

Within the next week, I'm going to try really hard to do a couple video reviews of the cloth diapers I do use.  My favorite brand is Fuzzibunz, but I also like Flips and BumGenius as well.  I'll go into more details later but until then, here is a pic of a few of my diapers; two Flips covers and a Fuzzibunz Elite!  Enjoy!


xoxo
Dani

Thursday, January 10, 2013

A little Paint Can Fix Just About Anything!


I typically always have a project going on in our garage, and am always seeming to have a vision for furniture that everyone else wants to burn for firewood!  I'm pretty positive that by now my hubby has given up trying to talk me out of my so-called "projects" and instead has embraced my hobby by letting me make a mess of the garage and parking outside when I've got paint and drawers laying all over!

I would say that my skills are novice, at best.  So if I can do this, anyone can.  All it takes is a little vision, elbow grease, and the right tools!  If you are going to start refinishing furniture, you are going to need a few staple items that will make your project a heck of a lot easier!  Here are a few...


Sanding Block


You definitely want to use a sanding block if you are going to sand anything flat by hand.  You don't want to be rubbing sandpaper right on the surface with just your hand.  Try it once, and you will know why!  Considering you can get this for under $3, there really is no reason to not have one! 

Tack Cloth


This tack cloth by 3M is used to wipe down the item you just finished sanding.  It is actually "tacky" and will pick up all of the dust leaving you with a clean surface to work with.  Just trust me when I say, skip the old rag, and use the tack cloth.  Once you go TACK you never go BACK!  (Don't mind my workshop humor!)

Electric Hand Sander


This bad boy is the best $30 I ever spent!  I can't believe how many projects we did without this!  It will save you so much time and energy.  I got mine at Wal-Mart, but you can get them pretty much anywhere.  I know some people prefer the Mouse Detail Sander to this, but I didn't want to have to deal with buying special pre-cut sandpaper, plus I wanted a larger sanding plate to cover more area in less time.  The mouse sander would be great for distressing things, but even then, that can be done by hand or with this sander as well. 

Aside from these, you will obviously need tools, sandpaper, paintbrushes, etc.  But if I were to go back to when I started, I wish I would have always had these items on hand! 

Next, I'll share some of our projects, the steps we took, and the products we used to transform them!

Until next time...

xoxo
Dani

How To Get Gum Out Of Hair

Lucky me!  The other day my four year old came to me with a huge glob of gum in her hair...right. behind. her. ear. 

After I gathered my bearings I calmly anxiously googled "How to get gum out of hair."  Lots of different suggestions came up, and as I suspected, the best method seemed to be a pantry staple.  Olive oil. 

The problem was, all of the "directions" I found for how to get it out included crappy photos of pretend gum and someone trying to go through the steps, which for them was probably a great thing, because clearly they were never in a position where they could really document the icky step-by-step photos for how to get gum out of hair!  

How To Get Gum Out Of Hair

You are going to need a few things:

- Olive Oil (or any oil you have laying around your house)
- Fine tooth comb
- Baby wipes, or wet paper towels
- Towel for draping over shoulders
- a bit lot of patience!

**This can be a messy process!**

Step 1:
Drape your lucky "client" with a towel so you don't dribble olive oil all over them or get the sticky-icky gum all over their clothes.  Pull the hair without gum in it up in a pony tail to keep it out of the way!


Step 2:
Rub olive oil on and around the mass of gum and hair. 


Step 3:
Let it set for a few minutes.

Step 4:
Begin slowly pulling the strands apart, as if you were trying to get out ratted hair.  The gum will want to pull with it, so you will want to make sure you begin working the hair apart, but not the gum.  The oil will help the hair pull away from the gum, strand by strand.  

**As you begin working the hair out of the gum, be sure to keep it out of your way by flipping it up over the head or using a small clip.**


Step 5:
After a bit of working, the gum will start to get, well, gummy again.  You will need to add more oil at this point.

**Notice the differences in each picture below, the first is "gummy" and the second was after I added more oil.**


Step 6:
Continue to pull the hair slowly out of the gum.  The oil will help break down the gum into smaller parts and it will start to look like this...
Also, as I get the gum out of the hair, I used a baby wipe to get it off of my comb.  I also used a baby wipe to keep one of my hands remotely oil free through the process. 


Step 7:
At this point, you will be able to use your fine tooth comb to comb the gum out of the hair. You will have to do this in small pieces until it is all out. Here is where you will need to whip out your patience!  In the below photo, I had removed about half of the gum.


 I was then left with this...


Step 8:
Add more oil and let it set for a few minutes!  


Step 9:
Finally, I was able to slowly pull out as many strands as possible, and the gum began breaking down and releasing from the hair.  I was able to slowly and gently come the rest of the gum out of the hair, and as I did it came out in one big clump! 


FINALLY all of the gum was out!  It really didn't take as long as I thought it would, either!  No scissors, peanut butter, or ice cubes required!  


Last and final step -- bath time! Keira was definitely happy that I didn't have to cut any of her hair off and I was happy at how easy the process was! For now, we have banned her from chewing gum, although I doubt that will last long!  So when that moment comes, at least I know how to get gum out of hair!  Ha! 

I'd love to hear suggestions or more tips!  Please share your secrets on how to get gum out of hair in the comments section below! 

xoxo
Dani

Wednesday, January 9, 2013

Who is The "Winey" Mom?

Hello and welcome to my latest creative outlet!  I've been meaning to start a blog for quite some time.  Actually, I've started several, with not much purpose or vision.  And I've got to say, the first post is always the most daunting.  Because, really, where do I even begin?  

Lets see... if you are reading this you are probably already a friend or family and know most of what there is to know about me!  For those of you that don't, I'll sum it up for you here!

First of all.... This is me...(and my super hunky hubby!)


However, in my own little world tucked away deep inside my innermost imagination, I like to think I am one of those super fantastic housewives from the 1950's that could bake a cake, clean the entire house, and still serve dinner in pearls and heels!  You know... like this:


But let's be real here, its 2013, and most days, the reality is more like this:


I guess if I were to sum it all up, I'd consider myself to be a modern-day, kinda-crunchy, pretty-crafty, wine-loving, Jesus-serving Mom & Wife!  I hope you all enjoy and return! 

xoxo
Dani