Friday, March 22, 2013

Pre-Schooler Activity: Water & Baby Food Jars


Being a mom of a pre-schooler, I've realized that they love to explore and experiment!  I am always looking for simple "experiments" for her to do and keep her busy!  While we were working on some gardening projects, she discovered that water in baby food jars created different sounds!  She was so excited, we ended up digging out a few more jars for her to play with.

This is an extremely simple, no-mess way to keep your child busy and explore his or her environment.  

Gather the following items:
  • Glass jars or glasses (I happen to have a lot of empty baby food jars, so I opted for those)
  • Water (preferably in something that your child can pour in and out of!)
  • Spoon or metal tool to create sound against glass
  • Other things to clink against the glass such as plastic spoons, wooden spoons, etc. for your child to decide themselves which one works the best  (Optional)

The first thing I did was fill each jar, starting with just a little bit of water, and then adding more and more in each jar.  Once that was finished, I had her use her "tool" to tap each jar and see what kind of sound each one created.  She was so excited to hear the different pitches of sound she got.

Once she realized that the water level was what caused the different sounds, she spent a good hour playing with the jars and water, changing the levels by adding and removing water to test the sounds. 

What I loved about this particular activity is that once I showed her how it worked, she was content keeping herself busy.  It didn't make a mess (other than spilled water), and she was able to do it by herself entirely!

Some good questions to ask your child:
  • What kind of sound does it make if there is just a little bit of water?
  • What kind of sound does it make if there is a lot of water?
  • What do you think will happen if we add more to the jar with the least amount of water? 
  • What do you think will happen if we pour out most of the water in the full jar?

This also opens up a good conversation about "pitch", because you will probably have to explain it to your child.  They will likely know in their head that one jar sounds higher and the other low, (and everything in between), but won't have the words to verbalize it.  

Most of all, have fun watching your child explore and learn!

xoxo
Dani

Wednesday, March 13, 2013

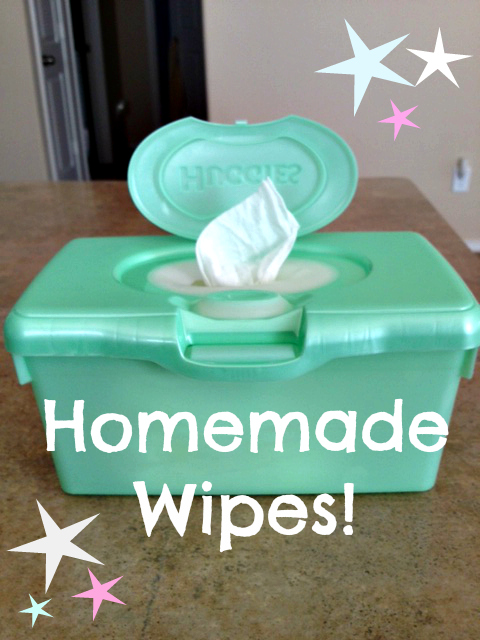
Homemade Wipes: In a Wipes Container


If you have been blessed with children that have incredibly sensitive skin, you may know a thing or two about making your own baby wipes.  It isn't difficult and you can create your own recipe using paper towels, baby wash, oil, and water.  Before I ever did this, I read through about ten different blogs and (no joke) none of them made their wipes the same way, so feel free to get as creative as you please.

I however, am a simpleton in this area.  I don't get fancy.  In fact, I prefer to just skip all of the hassle and buy wipes, but because of skin sensitivities, homemade wipes it is! 

**Because my least favorite part of this project is cutting the paper towel rolls in half, I always do this ahead of time and store them in the closet** 

To Make Homemade Wipes You will Need:
  • Viva Brand Paper towels in select a size (cut in half--so it looks like an over sized roll of toilet paper)
  • Leftover wipes container 
  • 2 1/2 cups of water (boiled and then cooled to room temperature)
  • 2 tbsp baby wash
  • 2 tbsp oil

Once you have boiled & cooled your water, mix in the baby wash and oil and swish it all around.  Honestly, I'm so lazy now when I do this, that I just eyeball it.  When I actually take the time to use the correct amounts, though, they turn out so much better!

Put your 1/2 paper towel roll inside the wipes container so that it's sticking out.  Like this...


Don't even bother wondering HOW this thing is going to end up fitting in here.  I was terrible in physics & science so I can't answer that for you.  I just know it works. 

Next, pour your water mix all over the paper towel roll trying to get it as saturated as possible and then pour the rest of the water into the container.  Once you have done so, press down on the roll so that it flattens down into the container.  Don't worry about what it looks like, we are going for practicality here.


Close the lid and flip the container upside down.  If the lid doesn't close entirely, don't stress about it.  I usually just lay mine on top of a towel and it hardly ever leaks.  Leave this upside down for at least 5 minutes.


After 5 minutes, flip it back over and open the lid.  Pull out the cardboard roll from the middle of the paper towels.  Trust me when I say DO NOT attempt to do this before this step.  I know some of you will try, and you will understand why I told you not to!  (I was that person, I tried it just because I had to know WHYYYYY I wasn't supposed to do it! lol)


When you pull the cardboard out, it should pull up the first "wipe".  If it doesn't, don't stress, just pull it out yourself.  Close the lid and pull it on through!  Viola!   You now have homemade wipes in an actual wipes container so you don't have to deal with annoying lids! 


What do you make instead of buying store-bought items?  I'd love links to your "recipes"!

xoxo
Dani

Thursday, March 7, 2013

There's Still Wax...But The Candle Won't Light!

It drives me crazy when my candles won't light, but there is still a ton of wax left in them!  Anyways, as dumb as it sounds, it hit me the other day that I have the perfect solution built right into my kitchen! 

Not everyone will have one of these, (sorry), but those of you that do are in LUCK! 

What am I all excited about?  A WARMER plate built right into the top of my range! 


That's all!  That's my big secret.  I just turn the warmer on (which is right between my two back burners) and sit the candle on there.  It gets hot enough to melt to wax and make my house smell better, but never so hot that the candle is too hot to handle. 

Impressive, I know.  But hey, I just saved myself ten bucks by not running out to by another candle for my kitchen!  :) 

xoxo
Dani

Tuesday, March 5, 2013

Cloth Diapering Basics

...By a very NON-expert!  


After getting quite a few questions from friends and family about cloth diapering, I decided to *attempt* to answer a few of the more common questions in a video!  If you haven't watched it yet, be sure to click play above!  

In this video, I will cover the following questions:
  • How do cloth diapers work?
  • What do you do with a wet diaper?
  • What do you do with a poopy diaper (because what mom doesn't love to talk about poop, right?!)
  • Why use cloth diapers?  

I'm still a newb to cloth diapering, but what I've figured out is that the best way to learn is to dive in head first!  No one cloth diapering momma does it the same, and we all have different tastes and preferences. While one mom may swear by all-in-one diapers, another may only like pockets, and some even like good old-fashioned prefolds!  There is no right or wrong, only what is right for you!

I'm excited about doing some more cloth diapering videos, and would love to know what other questions you have!  Once I have some more questions compiled, I will get another video together!  So be sure to leave questions in the comments below!

xoxo 
Dani

PS- This was my FIRST video ever so be sure to spare me some grace!  :) 

Tuesday, February 12, 2013

Happy Engagement - Anniversary!

Two years ago, my Hubby, (then boyfriend), melted my heart on a sunny beach in California with those four little words every girl dreams about, "Will you marry me?" scribbled on the crisp leather of a brand new baseball. 

I still get excited when I think about our engagement, because it was so perfect and so perfectly tailored to us and our story.  We had talked about marriage plenty, and even talked about our future wedding a lot, in fact, the ring was already picked out (with my help of course), but I wanted an official proposal.  I wanted the kind of proposal that we would have fun retelling to our kids someday.  One with romance and young love -- (you know, the kind of story that will make them want to gag and leave the room! HA!)

The bar was set pretty high, but boy, did my man deliver!


What the video doesn't show was his cousin hiding to capture the entire proposal on camera for us.  Or the bag he had already packed for me with a change of clothes and my makeup to get ready for dinner, which he had already made prior reservations for. Or the personalized bottle of champagne and balloons from one of our good friends on our table when we arrived. Or the engagement gifts that awaited us at home already. It definitely doesn't show the six years prior to being engaged that we had devoted to each other: the good, the bad, the trials, and the celebrations (and trust me, there were plenty of all of those things!).

It was a day that I had dreamed about since I met Brian and knew he was "The One".  It was the kick-off to the best Valentines Day ever.  It was a moment that will never be overlooked, under-appreciated, or forgotten.

Happy "Engagement Anniversary" Baby!  Thank you so much for taking the time to plan the most perfect, special, & memorable proposal two years ago! 

xoxo
Dani


How did your husband propose?  Or if you ARE the husband, how did you propose?  Please share in the comments below!  I love to hear stories :)

Wednesday, February 6, 2013

DIY Desk Re-do: From Trash to Treasure!


As I've mentioned before, one of my favorite hobbies is refinishing old furniture!  I love seeing each piece come to life after a transformation!  This project was one that almost didn't happen, but after seeing how beautiful it turned out, I'm so glad it did!

I'll spare you the details on where we got this desk, because it's kind of a long story,  but we didn't pay a dime for it!

This is what it looked like when we brought it home...


Ugh!  I can't lie, it was pretty nasty looking.

**If you aren't sure about the difference between supplies, sanders, etc... see my post HERE**

First Things First!  SANDING!  

The first thing we did was sand it down using our hand sander.  Brian took over this part of the project since I was consumed with "Motherly Duties", so I can't comment on what grit he used, but I'm pretty sure it was 60 or 80.  The idea is just to "rough up" the surface layer.  You want to make sure you aren't scratching it all up or trying to sand off more than necessary!  

Tack Cloth is My New Best Friend!

Next, we wiped it down good with tack cloth.  If you are going to be sanding anything down, I HIGHLY recommend having tack cloth on hand!  It's super cheap and gets the job done.

Primer Isn't Always Necessary If you Sand Properly!  

We skipped primer and went straight to paint.  If we weren't painting this desk black, I probably would have used a primer just to help coat the darkness of the finish, but I personally think primer is a waste of time when going from dark to darker!  If you have sanded well enough, there is no reason the paint shouldn't adhere. 

Quality Paint Makes a Difference! 

I can tell you from experience, that quality paint makes all the difference when refinishing furniture.  I have done projects with just cheap interior wall paint, and I've done projects with pre-mixed higher quality paints.  For this project we used a pre-mixed black Valspar paint. Since I'm not home, I'll have to update with the actual paint we used later!

Don't Skip the Sealer! 

It's important to seal your project!  We use a spray-on, Valspar clear semi-gloss.  It goes on so nicely and finishes off the project.  It makes wiping it down easier too!  You definitely don't want to finish this step.

Finish With Affordable Hardware!

Hobby Lobby is usually my go-to spot for new hardware.  It's incredebly cheap, usually $3 a piece, and they have a huge selection.  However, they didn't have the sleek, silver finish I was looking for, so we headed to Target.  Luckily they had what we wanted for about the same cost!

FINALLY My Vision Came to Life!  


It turned out perfect!  Even Brian, who really, REALLY didn't want to bring this desk home admitted that he was glad I talked him into it! 


More projects to come!

xoxo
Dani

Friday, February 1, 2013

Finish The Sentence Friday: My Stint With Reality TV!

Today is a big day for me!  I am joining in on my first "Blog Hop!"

If I'm being completely honest, I have no clue exactly how it works, but I'm happy to jump in because (a) I don't have to choose a topic to write about, it's already decided for me... and (b) I get to meet lots of other cool bloggers.  Win-win!

This particular blog hop is called Finish The Sentence Friday, and the topic this week is:

When it comes to reality TV shows, I... 

...Remember the time I got to be a part of one!


Yup!  You read correctly!  Never in a million years would I have thought I would be a part of reality TV, but a couple years ago the opportunity came up and I jumped on it!  

If you read my last post, you saw that I worked with my friend, Tara, over at Fairytale Hair & Makeup.  Fairytale specializes in hair & makeup for weddings, specifically on-location (that means, there is no studio or salon, we drove wherever we were needed). Tara built up quite a name for Fairytale, and one day she got an offer that none of us could refuse:  An opportunity to do the hair for a bridal party that was being featured on David Tutera's "My Fair Wedding".  


In case you don't know who David Tutera is or don't have a clue about the show My Fair Wedding, for us at Fairytale, this was like getting to go to the SUPERBOWL of the bridal hair & makeup world. (It's. a. BIG. Deal!)


Besides the excitement of getting to work along side the fabulous & gorgeous David Tutera, we were all sick with nerves at our work being on TV!  Talk about pressure! 


It ended up being an amazing experience, loads of fun, and David and his crew were completely awesome to work with.  Fairytale gained a ton of exposure and future jobs with the show (which of course I no longer got to be a part of since I moved out of state- BOO!).  

Overall, it was something that I was so glad I got to be a part of!  I was lucky to have my little (correct that), very tiny place in the reality TV world!  

And just for kicks, when I was digging through old location pics, I found this little goodie from when we had a gig for a Progressive Insurance promotion and we got to meet FLO!  And no, that is not a look-a-like, it was really her!  So much fun!  


Do you have any good "Reality TV" stories?  Share them in the comments below!  

**Link up to Finish The Sentence Friday Here**


Finish the Sentence Friday